Django에서 API문서 관리 Swagger 사용법
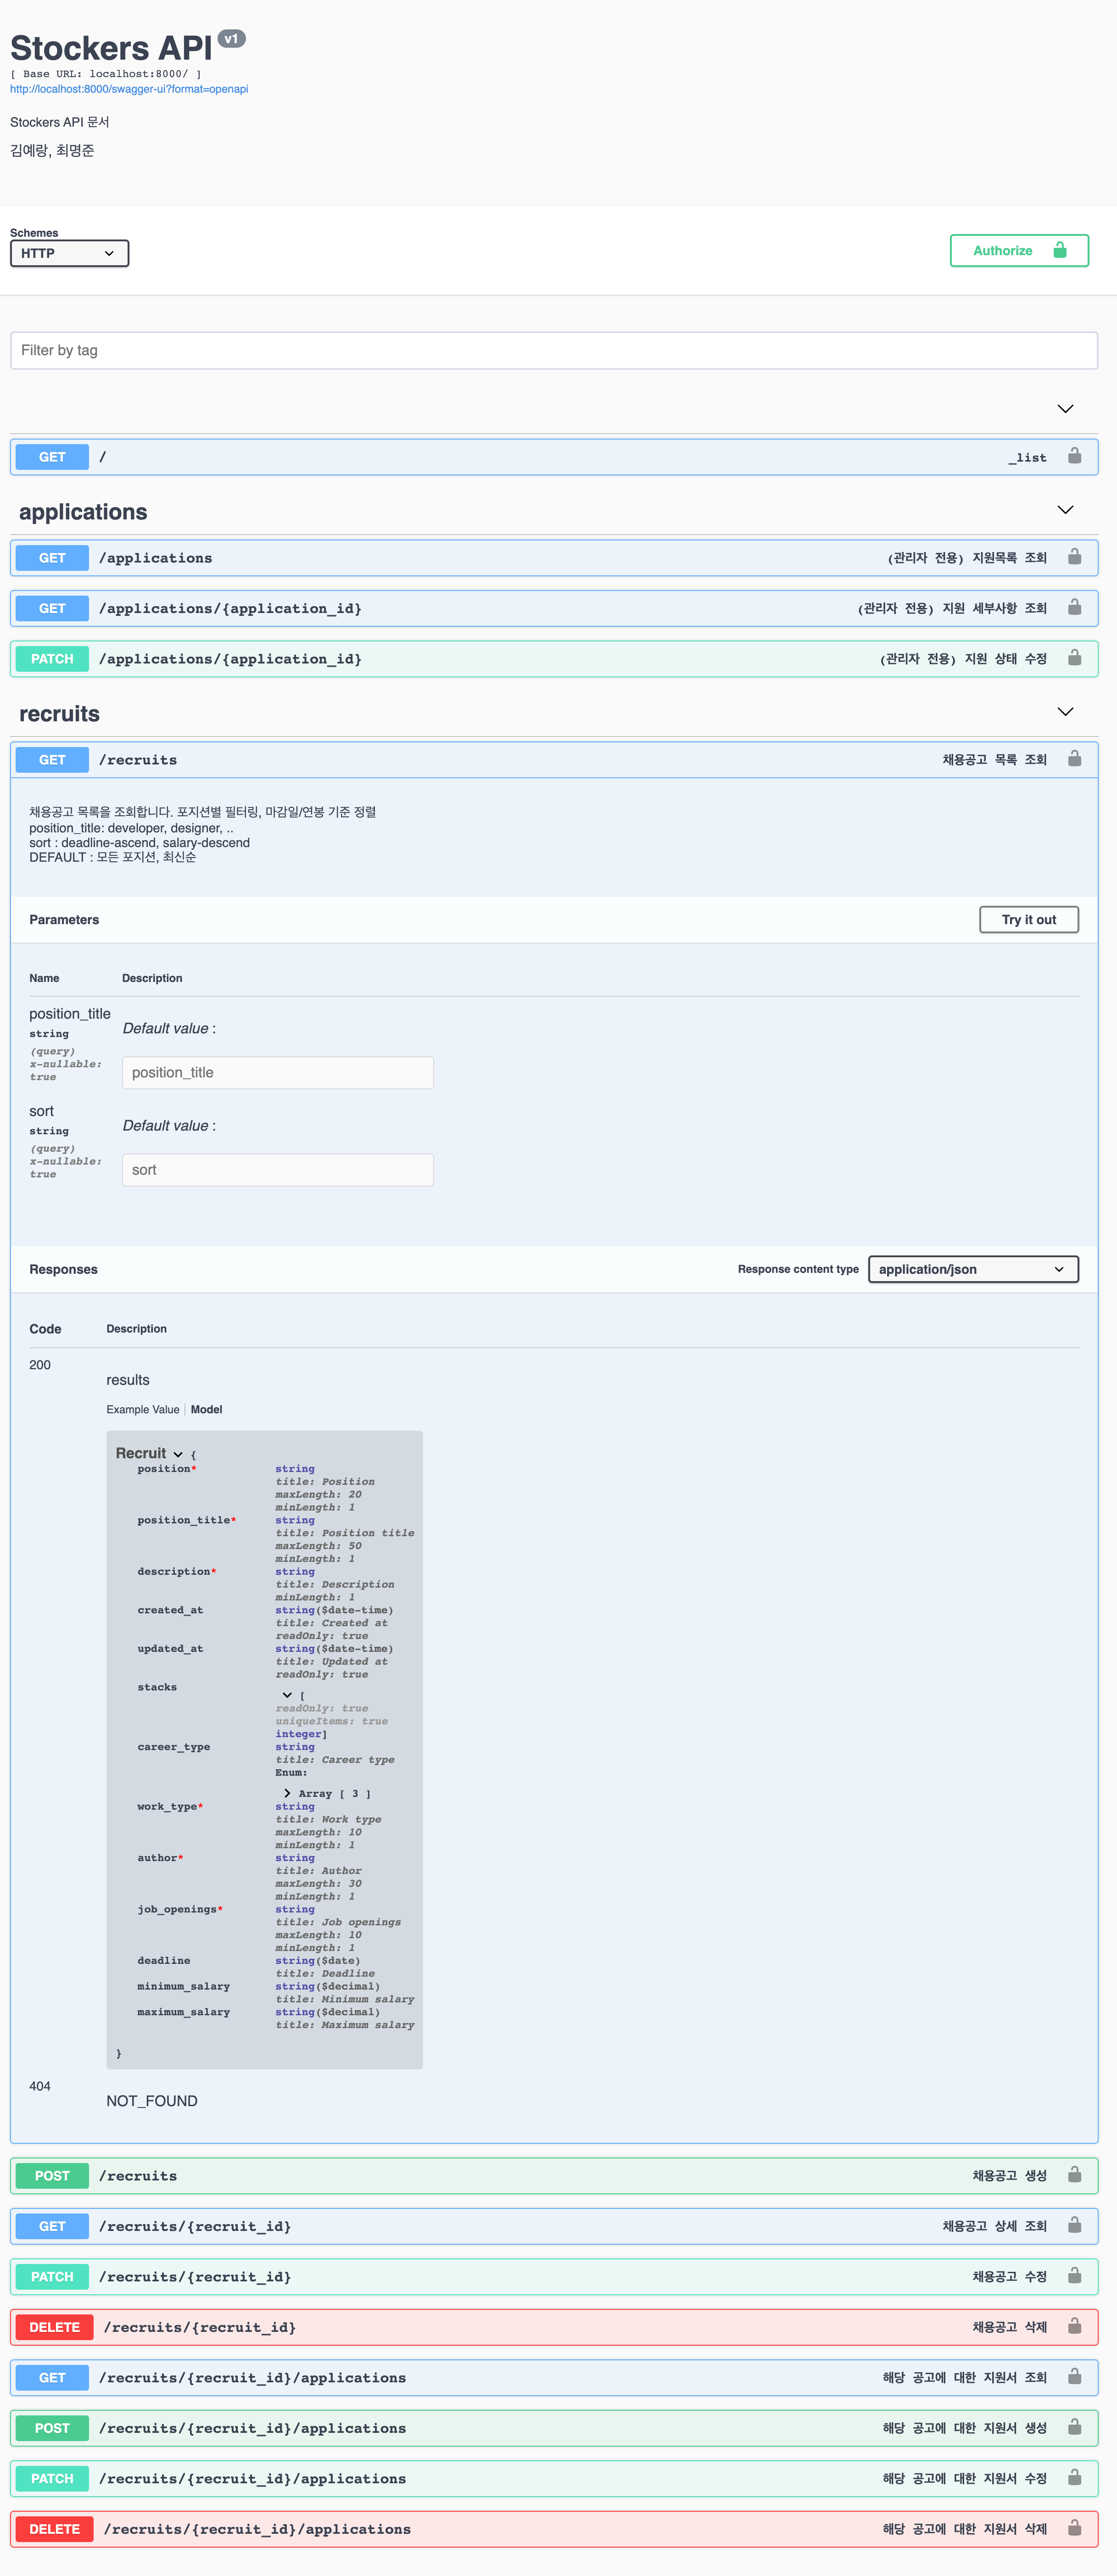
16 Sep 2021 | django TIL스웨거 예시

스웨거 설치
django-rest-swagger 패키지는 더이상 관리안해서 drf-yasg를 쓰도록 추천한다고 한다.
출처: https://hyeonyeee.tistory.com/66 [hyeoneee’s blog]
pip install -U drf-yasg
파일 설정
INSTALLED_APPS = [
   ...
   'drf_yasg',
   ...
]
‘django.contrib.auth’ 부분 주석처리했으면 풀어주기
urls.py
#urls.py
from django.urls import path, re_path, include

from rest_framework import permissions
from drf_yasg.views import get_schema_view
from drf_yasg       import openapi, generators

class BothHttpAndHttpsSchemaGenerator(generators.OpenAPISchemaGenerator):
    def get_schema(self, request=None, public=False):
        schema = super().get_schema(request, public)
        schema.schemes = ["http", "https"]
        return schema

urlpatterns = [
    path('users', include('users.urls')),
    path('applications', include('applications.urls')),
    path('recruits', include('recruits.urls')),
    path('', include('helloworld.urls')),
]

schema_view = get_schema_view(
    openapi.Info(
        title            = "******** API", #타이틀
        default_version  = "v1", #버전
        description      = "******** API 문서", #설명
        license          = openapi.License(name=""),
    ),
    public             = True,
    permission_classes = (permissions.AllowAny,),
    generator_class    = BothHttpAndHttpsSchemaGenerator,
)

urlpatterns += [
    re_path(r'swagger(?P<format>\.json|\.yaml)$', schema_view.without_ui(cache_timeout=0), name="schema-json"),
    re_path(r'swagger', schema_view.with_ui('swagger', cache_timeout=0), name='schema-swagger-ui'),
    re_path(r'redoc', schema_view.with_ui('redoc', cache_timeout=0), name='schema-redoc'),
]
뷰에 데코레이터 작성하기
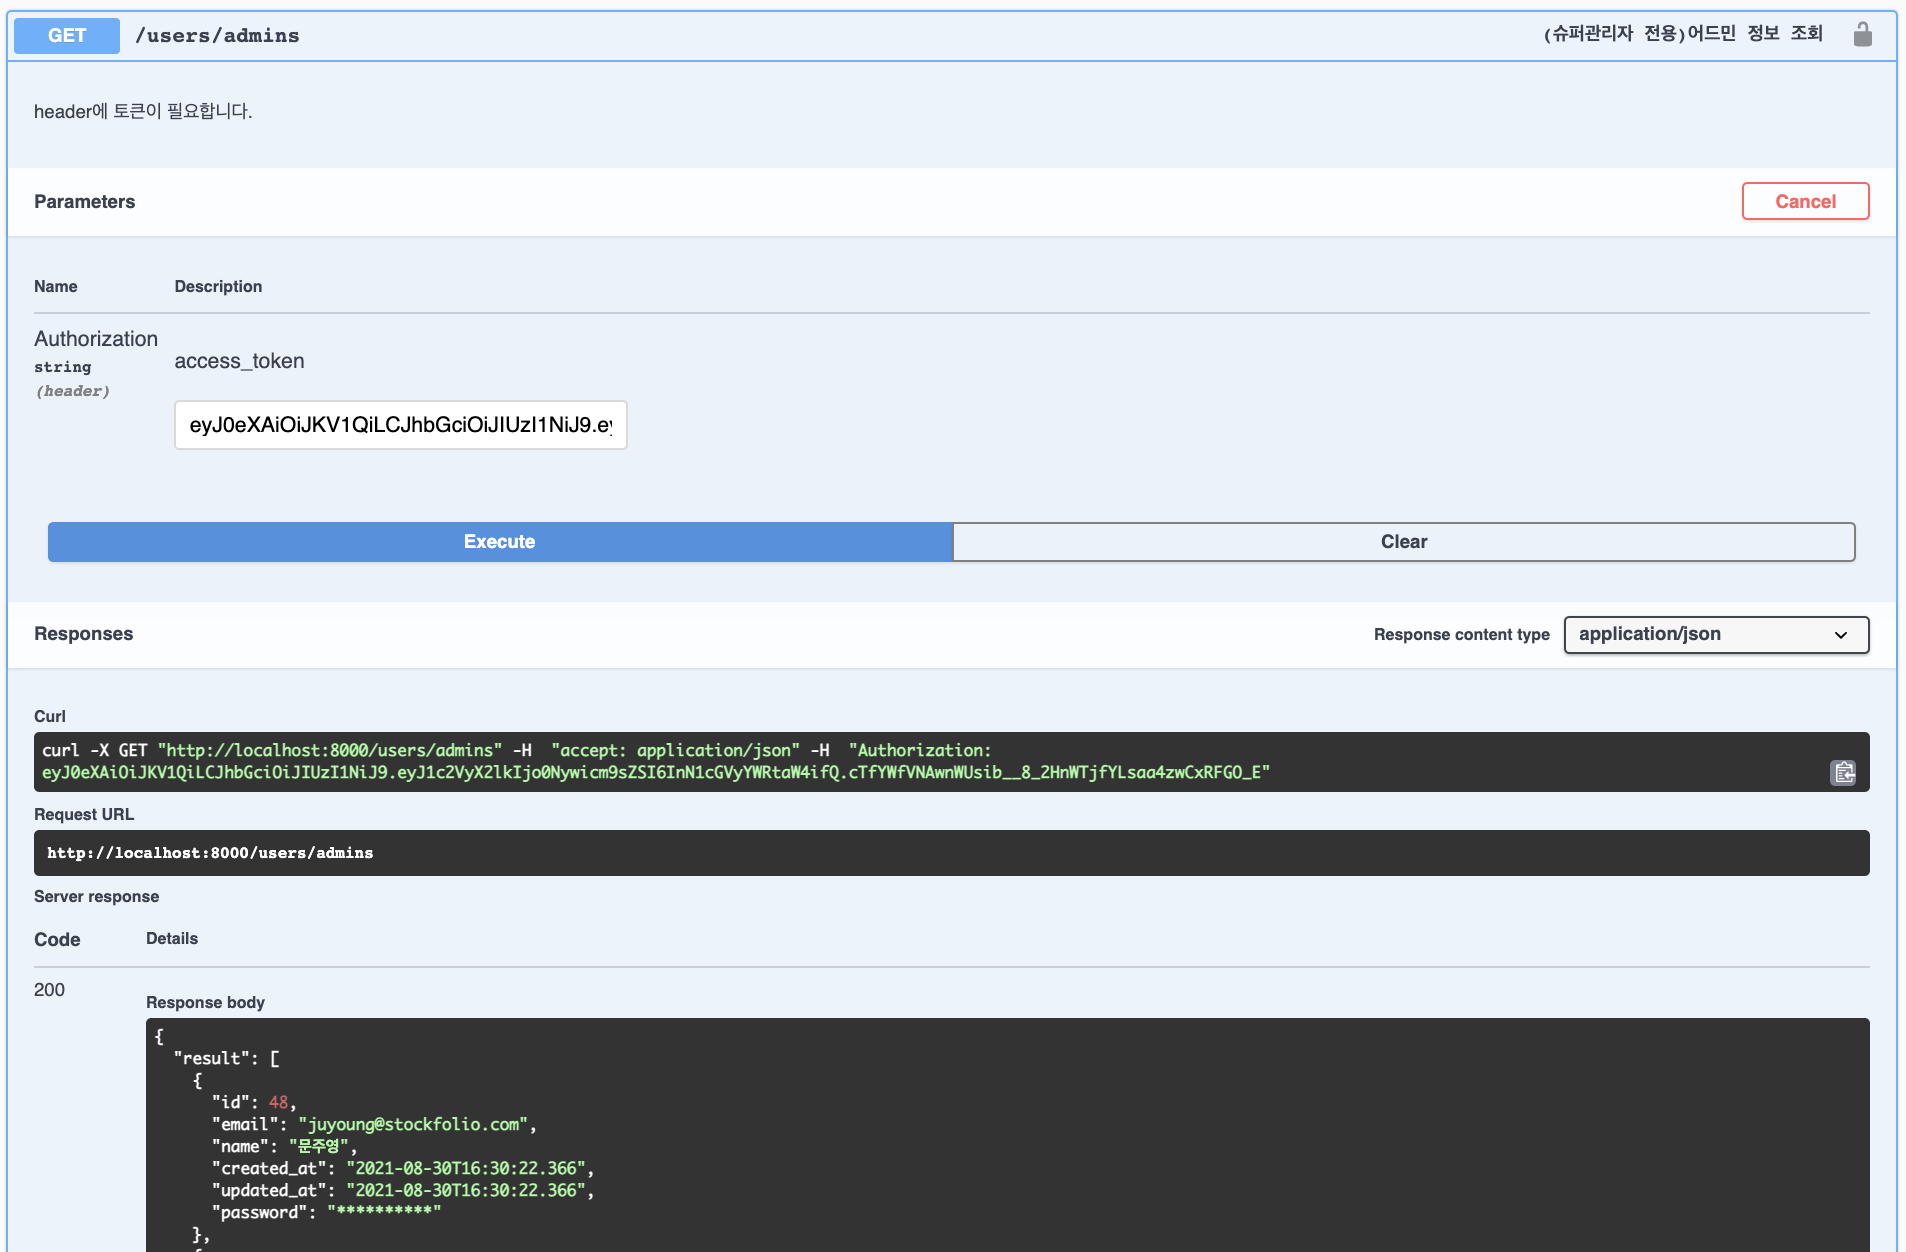
class SuperAdminView(APIView):
    parameter_token = openapi.Parameter (
                                        "Authorization",
                                        openapi.IN_HEADER,
                                        description = "access_token",
                                        type        = openapi.
                                        TYPE_STRING
    )
    supaeradmin_get_response = openapi.Response("result", SuperadminGetSerializer)
    #이 부분에 대한 설명 : https://swagger.io/docs/specification/describing-parameters/

    @swagger_auto_schema (
            manual_parameters = [parameter_token],
            responses = {
                "200": supaeradmin_get_response,
                "400": "BAD_REQUEST",
                "401": "INVALID_TOKEN"
            },
            operation_id = "(슈퍼관리자 전용)어드민 정보 조회",
            operation_description = "header에 토큰이 필요합니다."
        )
    #http://localhost:8000/swagger-ui 상에서 보여질 부분

    @superadmin_only
    def get(self, request):

        result = [{
            "id"        : admin.id,
            "email"     : admin.email,
            "name"      : admin.name if admin.name else admin.email.split('@')[0],
            "created_at": admin.created_at,
            "updated_at": admin.updated_at,
        } for admin in User.objects.filter(role='admin') ]

        return JsonResponse({"result": result}, status=200)
    #실제 함수
이렇게 하면 서버를 구동했을 때 스웨거 페이지(http://localhost:8000/swagger-ui) 상에 표시가 되고 페이지 상에서 데이터를 입출력!!!해볼 수 있다.

배포가 되면 스웨거가 이렇게 오픈이 되서 서버구동 없이도 url을 통해서 아무나 접근할 수도 있다.
https://api-we.stockfolio.ai/swagger
